Eyedropper bottles, a traveler’s best friend

With the TSA’s current “3-1-1” rule that prohibits air travelers from carrying bottles of liquid larger than 3 ounces (slightly less than 100 ml), a lot of people have started saving their bottles of hotel shampoo or various travel-size samples they come across.

While those smaller bottles and containers will definitely pass muster at the airport security checkpoint, I personally don’t think they’re your best option. For my money, the best thing to do is to transfer your favorite liquid products into eyedropper bottles.

You can either reuse bottles of eye drops you have in your medicine cabinet, or purchase empty ones. The empty ones you purchase are usually transparent, making it easier to see how much liquid you have left. Recycled eye drop bottles are usually not, making them better candidates for storing photosensitive facial serums and such.

Why do I think eyedropper bottles are so much better?

  • The opening is very small, letting you control how much you disburse at once.
  • The small opening with a separate twist cap means it’s practically impossible for them to leak.
  • The air pressure caused by trying to dispense your liquid through a small opening means it’s significantly easier to get thick liquids out without excessive tapping.


Sample eyedropper bottles of various popular sizes. From left: 1 ounce (30ml), 0.5 ounce (15ml), 0.45 ounce (10ml), all over-the-counter eyedrops, and a half-ounce transparent bottle (purchased as an empty bottle).

How to make your own perfect toothpaste in a bottle

I’ve never been a big fan of tube toothpaste. My favorite is the liquid gel toothpaste from Colgate. Now, I realize you can buy toothpaste powder to avoid having to put your toothpaste in your 3-1-1 baggie, but I’m not a big fan of brushing my teeth with powder; it feels a bit too abrasive for me.

Instead, what I do is tranfer my favorite toothpaste into an empty eyedropper bottle.

A regular bottle of Colgate toothpaste and an empty half-ounce eyedropper bottle.

Step 1: Start by removing the outer cap and the inner dispensing tip.

Start by removing the cap and inner dispenser cap.

The inner dispenser cap is the secret to these bottles, so make sure you don’t lose it.

Step 2: Carefully suqeeze the liquid from your main bottle into the dropper bottle.

Squeeze your liquid into the dropper bottle.

The easiest way to ensure that you can get all the liquid into the dropper bottle while minimizing spillage is to squeeze the dropper bottle and slowly let it expand as you inject liquid into it. The expanding dropper bottle “sucks up” the liquid you are pouring in.

Once the bottle dropper is filled (not quite to the brim; you want enough room for the dispenser tip to fit without spilling), press the dispenser tip until it snaps into place, then twist the cap closed.

Step 3: Take a permanent marker to a mailing label and write down the contents of the bottle.

Write down the content of the bottle on a label.

If you are labeling a bottle that you know will get wet regularly (such as shampoo), use weatherproof mailing labels like this one from Avery. Otherwise, your standard mailing label works just fine.

Avery\'s Weatherproof White Labels.
Weatherproof White Labels from Avery won’t dissolve if your bottle gets wet.

Step 4: Stick your label onto your bottle. To prevent the label from being crooked, align the end of the label against the vertical seam that runs down one spot on the bottle.

Carefully place the label onto your dropper bottle.

Complete! Ta-da! You now have your very own dropper bottle full of toothpaste!

Your own dropper bottle of toothpaste.

One big advantage of using a dropper bottle for toothpaste is that the dispenser cap ensures that you will always get a perfect line of toothpaste to squeeze onto your brush. You will have less waste, and the bottle will stay clean without extra toothpaste clinging to the bottle’s threads.

Before you wonder if a half-ounce bottle is enough, try this test: When you buy your next tube or bottle of toothpaste, use a permanent marker to write down the first day you start using it. Use this same tube/bottle until it runs out, and note the finish date. Figure out how many days it took to go through the full container, and divide it into the size of your container. Chances are, half an ounce of toothpaste will last you at least a couple of weeks. If you’re very fastidious and prefer to brush after every meal, consider taking two of these dropper bottles of toothpaste. When you’re done with one bottle, just toss it in the trash and your 3-1-1 bag just got lighter!

Tips for transferring from a tube (vs. a bottle):

If you like the thicker toothpaste from a tube, it might not be as easy to pour your toothpaste into a dropper bottle. If this is your situation, carefully take your dropper bottle (with the dispenser cap removed), and carefully insert the opening into the mouth of your toothpaste tube. Chances are your dropper bottle will fit, and you can carefully squeeze your toothpaste into the bottle. Make sure you start by squeezing the extra air out of your dropper bottle and expand is as you squeeze in the toothpaste.

You can use dropper bottles for all sorts of liquids, and use different sized bottles based on your need or length of trip. Want to take your favorite fragrance but you don’t want to take a glass bottle on your trip? Carefully transfer your cologne into the tiniest dropper bottle (such as the quarter-ounce size). The cap will stay on and you won’t have to worry about broken glass. And the dispenser cap means you can carefully dab one drop on your wrist!

The biggest advantages about using dropper bottles is that you don’t have to try to find travel-size bottles of your favorite toiletries, or settle for odd-smelling conditioner because that was the only thing available at your local drugstore, and you will wind up with a ton of more space in your 3-1-1 toiletry bag!

A 3-1-1 baggie with regulation-sized toiletries. The same 3-1-1 baggie with a lot more space.
On the left, a regular 3-1-1 baggie with regulation-sized liquid bottles. On the right, the exact same items, with some adjustments to containers including using dropper bottles.

These bags both contain bottles of shampoo, conditioner, hair spray, daytime face lotion, sunscreen, liquid foundation, facial cleansing lotion, clear nail polish, and toothpaste.

Travel toiletries in the back, with their smaller siblings in the front.

By converting a few of these products into dropper bottles, we’ve been able to save quite a bit of space.

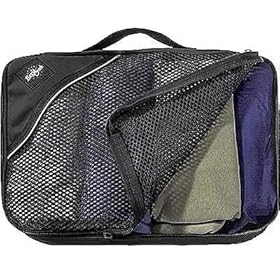
Finally, forego the disposable baggie, and go with a transparent plastic toiletry bag with a real zipper. The big benefit to those is that they are pleated, meaning you can fit a a lot more items in there.

Minimized toiletries in a zippered toiletry bag.

It looks cavernous in there! Now you have more room to add extra bottles (which you can toss as you go), or add extras like a folding hair brush.

One more thing: This isn’t just for air travel. A small on-the-go kit like this is a great little pouch to keep in your purse (hey, you can brush your teeth after that onion lunch and not worry when you step into your afternoon meeting), or keep it in your gym bag.

Happy toting!

Packing light in the news

Two newspapers recently published articles about packing light.

The first, titled “Travel light and elude fees with a well-packed carry-on,” is a standalone list-based article by Chantal Lamers that ran today (July 22, 2008) in the The Orange County Register. The article is based on an interview Chantal had with me, and should serve as a nice list of tips as you learn how to pack lightly.

The second is a more comprehensive set of articles under the banner, “The Art of Traveling Light,” which published this past Sunday in the San Francisco Chronicle. Staff writer John Flinn has put together a number of short, helpful articles, including:

Nothing completely new in these articles if you are already familiar with our travelite philosophy, but presented in little nuggets they are quite handy.

It’s also quite nice to see mainstream media give credence to this topic, which has traditionally belonged on the fringes. You should’ve seen the looks I used to get from people when I told them you could travel extensively out of one bag.

Rolling Uprights: Behemoth SUVs of 2008

I was going through my morning e-mail and noticed a summer luggage sale announcement from an online bag seller. The e-mail’s subject title said something like, “Save Big for Summer Travel,” enticing me to see what sort of wonderful bargains I could find.

The e-mail listed the seller’s top recommendations for bags for summer travel. All but one were for rolling uprights (and the tenth in that top 10 list were packing cubes and pouches with the seller’s inhouse brand).

The wheels and handlebars of rolling uprights make moving around an airport with them a breeze, but the convenience comes at a stiff price. To me, rolling uprights are the SUVs of the luggage market. You might have a nice ride, but is it really worth paying $5.00 a gallon when you only get 15 miles per gallon?

Let’s take a look at what’s wrong—and outdated—about rolling uprights in today’s travel environment:

  • The wheel-and-handle mechanism adds substantial weight to a carryon.
  • The wheel-and-handle mechanism sacrifices internal capacity.
  • Most rolling uprights don’t come with shoulder straps or even D-rings on the ends on which to snap a shoulder strap to; if you need to quickly walk up the stairs you are in for a real workout.
  • The wheel-and-handle mechanism makes rolling uprights almost impossible to stow under a seat.
  • The firm shape of most rolling uprights make them almost impossible to squeeze into a crowded overhead bin. No overhead bin space? Wave your precious carryon good-bye as the flight attendant hangs a check-in luggage tag on it.

To get an idea of just how much you are giving up for those wheels, let’s compare two very similar bags: the JanSport Weekaway convertible travelpack, and the JanSport 19″ Upright rolling carryon. Both are part of JanSport’s popular SuperBreak series. They make comparing the formats easy since the two are nearly identical, except that the Weekaway has stowable backpack straps, and the Upright has the wheels and telescoping handle.

If you were to place these two bags side by side, they would almost be identical in size. The main difference you’d notice is that when empty, the Weekaway deflates into almost complete flatness, while the Upright maintains its shape due to its firmer skeletal structure.

Jansport's Weekaway travel pack The Jansport 19
The Jansport’s Weekaway convertible travelpack on the left, compared to Jansport’s 19″ Upright model on the right.

JanSport Weekaway travelpack specifications:

  • Fabric: 600 Denier Polyester
  • Weight: 2 pounds 4 ounces (1.0 kilogram)
  • Dimensions: 20″h x 12″w x 8.5″d
  • Capacity: 2700 cubic inches (44.2 liters)

JanSport 19″ Upright specifications:

  • Fabric: 600 Denier Polyester
  • Weight: 6 pounds 1 ounce (2.8 kilograms)
  • Dimensions: 19″h x 13″w x 9″d
  • Capacity: 1900 cubic inches (31.1 liters)

Take a look at their weight. The Weekaway weighs a tad under two-and-a-half pounds while the Upright weighs over six pounds—yup, the wheel mechanism adds almost four pounds to the Upright. Not all convertible travelpacks are as light as the Weekaway, since most use the heavier Cordura than the lightweight denier polyester of JanSport’s SuperBreak series of bags—but what matters here is the actual weight difference between the two, since the extra weight comes almost completely from the wheel-and-handle mechanism.

Finally, compare their capacity. The Weekaway can carry 2700 cubic inches, while the Upright can only carry 1900. The 800-cubic-inch difference is specifically due to the wheel and handle mechanism:

The convenience of wheeled luggage is costing you a third of your carryon space. This difference is startling.

There’s a reason automobile dealerships are having difficulty selling their behemoth SUVs this year. A lot of people have wisened up to the need to be more economical, choosing instead to go with a lighter vehicle that sips gas.

If you are traveling by air this year and you are trying to pare down what you pack and figuring out what to leave at home, take a moment to consider what you’re going to pack your stuff in. Unless you have physical limitations such as a bad back that makes wearing backpack-type straps uncomfortable, consider leaving your rolling uprights at home and dust off that old convertible travelpack you bought 10 years ago.

Super easy cosmetic kit

I previously mentioned some mesh bags and pouches you can use to carry your non-liquid toiletries in your travels.

I just returned from a quick run to an office supply store and was reminded of one of the cheapest and most convenient “toiletry kit” pouches around: The pencil pouch.

The Pencil Pouch from Staples.

You can find pencil pouches in most office supply stores, but during this time of year as we creep into the “start of school” sales, you will likely find these in most larger box stores for a very affordable price.

Most of these types of pencil pouches have holes to put them in a 3-ring binder, and they all have a straight-across zipper. They come in a variety of colors, and many of them also have a loop or keyring for hanging.

About the only real difference other than color is in the front panel: Some have an open-air mesh format, while others use clear plastic. Some use both.

Either way, these pencil pouches are realtively small, but are long enough to fit things like eyeliner pencils and eyeshadow brushes. They are not pleated, but you should easily be able to fit most of your non-liquid toiletries in them just fine.

Best of all, when these are empty, they lie completely flat. They’re so cheap you might even consider using one of these to create your own in-flight amenity kit, with eyeshades, ear plugs, socks, and such.

When looking for a pencil pouch to use as a toiletry kit, make sure the zipper works pretty smoothly, and that the sides are hemmed well. These items are imported from overseas and don’t go through the same quality-control scrutiny you would see with expensive cosmetics bags.

Happy packing!

Toiletry kits

Mary C. recently wrote to me with the following:

I am so glad that you have started up your Web site again. I have checked it consistently for years hoping to see something new. You have always had the most wonderful suggestions for traveling light. My husband and I have been traveling with carry on bags since the Denver International Airport started up its new baggage system which tore up or lost bags consistently. We never check anymore and I am always looking for ways to reduce what I carry.

Can you please do an article on small toiletry kits? Since we cannot put our liquids into the kits any longer, we really don’t need to tote much on our trips. All the kits I see online are so large that they take up most of your carry on bag. I cannot be the only person that wants a kit that is small, has a hanger for convenience, and easy to access. It would be very interesting to find out what type you would use on your travels.

Boy, I sure remember all those horror stories about that baggage system when Denver’s new airport first opened. Although I’m sure they’ve ironed out those wrinkles, I’m glad that gave you the opportunity to start packing lightly.

Travelon Independence Bag Toiletry KitLewis & Clark's Hanging Toiletry KitThe Body Shop Hanging Wash Bag
From left to right, some examples of typical toiletry kits:
Travelon Independence Bag Toiletry Kit, Lewis & Clark’s Hanging Toiletry Kit, and The Body Shop Hanging Wash Bag.

As for small toiletry kits, you ask a great question. You wanna know a little secret? I don’t use toiletry kits!

The problem with products sold as “toiletry kits” is that they tend to include the whole kit and caboodle. Most of them have extra pockets, a built-in hanger, a mirror, and many more features. On top of that, because toiletries are designed to hold bottles and tubes, they are by nature crafted to be able to stand up on its own. A good toiletry kit should be sturdy enough for you to let sit on your hotel’s bathroom counter, like a box of facial tissue.

The problem, as you’ve already encountered, is that they’re simply way too big for traveling with lightly.

I know what you’re thinking. “Lani, if I have to stuff all the liquid items into tiny bottles in a quart-sized plastic bag, I have so much else that can’t fit, that’s not liquid, that has to go somewhere. I need a toiletry kit!”

Not so fast. Let’s take a look at what you can do to pare down the contents of your toiletry kit.

Minimize what you need to pack in a toiletry kit

Blow dryer/curling iron/hair straightener – How important are these for your hairstyle? Is there a way you can wear your hair so that it doesn’t need to be blow-dried, curled, or straightened? Better still, can you talk to your hair stylist about getting a wash-and-wear style for your trip? If you are traveling for business, your hotel room will likely have a blow dryer. If not, a quick call to the front desk will patch you through to someone who can bring up a blow dryer for you, usually at no charge.

If you absolutely refuse to go without a blow dryer, you can do two things: A) Get a very small travel-sized blow dryer, and B) Pack it in a (clean) sock so you don’t need to take up precious room in your toiletry kit.

Electric razor/beard trimmer – My suggestion is to just buy a disposable razor at your destination. If you wear a beard or mustache that needs trimming, you can either take care of that before your trip (trimming everything shorter than you normally would, and letting it grow out during your trip), or just purchasing a small pair of scissors at your destination. Remember that you can also take a blunt pair of scissors with you, and that round-tipped trimming scissors designed for babies will do the trick for most beards and mustaches.

Hairspray aerosol can – I really discourage travelers from using aerosol cans. Even the smallest ones designed for travel are still pretty bulky. While the finer mist from an aerosol can provides a nicer finish, consider if the hassle of carrying one beats the convenience of using a very small travel-sized pump spray bottle (or an even smaller hand-sanitizer pen-sized mister filled with hairspray liquid).

Shaving cream – If you’re used to your can of shaving cream or gel, you might be surprised to learn that there are a lot of great alternatives, not the least of which is ordinary soap!

Anti-perspirant/deodorant – In addition to smaller travel-sized versions of these, you can also use “deodorant crystals.” Brands like Crystal Body Deodorant are often found in health food stores, and are basically mineral salts that inhibit bacterial growth in your armpits. These are neither liquid nor gel, and need not be packed in your transparent plastic baggie.

Tip: To minimize body odor, consider trimming your body hairs before your trip. Guys, you might feel awkward imagining trimmed armpit hairs, but taking them down to a short length (for example, half an inch) will make it harder for bacteria to thrive. You can do the same with your… other regions! Left-handers with no family member willing to help trim the left armpit (or the right for right-handers) might consider actually shaving the area before the trip. Just do so a week or so before the trip to give it time to grow back. Make sure to use a new razor and wet the area well to avoid painful snags or ingrown hairs. An electric beard or hair trimmer would be easiest here.

Hair brush – If you have too much hair that you cannot use a small comb, consider getting a travel brush that folds in half. There are a couple of popular styles (this one, from Magellans, being one of the most popular), but the common feature is that they usually fold in half. Getting a hair brush with a handle that folds away or collapses is a great way to save space in your toiletry bag.

Folding travel brush from Magellan's.
Folding travel brush from Magellans.

Manicure set – Instead of taking a large grooming set with you, pare it down to the minimum: Nail clippers with a built-in nail file, and a small pair of tweezers. I don’t like to cheap out on tweezers. I prefer the more expensive ones from Sephora or Tweezerman (with the slanted head), because they are so exact as to make removing slivers and eyebrows easy. They don’t lose the grip on what you’re tweezing, and they pull cleanly so you it doesn’t hurt anymore than it should. Everything else related to manicures, I suggest leaving at home. If you’re worried about chipping your nail polish, simply go au naturale but get a nice glossy buff instead.

Make-up – If you removed your electric gadgets and bottles of liquid, most likely what you will be left with is your make-up. Although this one probably deserves its own entry, for now my suggestion is to go with minimal make-up and using smaller containers.

Now that you’ve pared your toiletry kit packing list down to the minimum, half your battle is over, and you no longer need a large bag! Now let’s take a look at some options for a smaller toiletry kit.

Sample toiletry kits

My favorite is the Eagle Creek Pack-It system, because they have so many sizes and variations that you’re sure to find one that fits your needs. A couple of their items stand out:

Eagle Creek Pack-It Cosmo Pouch – Designed specifically to hold cosmetics, this very simple pouch is what I use. It’s lined with polyurethane so I don’t have to worry if I spill a bit of eyeshadow powder. This pouch is pleated and you can get a surprising amount into it. Its only drawback is that if you have a lot of tiny items (lip balm, eye drops, tweezers), you might have to hunt around for them at the bottom of the bag.

Eagle Creek Pack-It Cosmo Pouch
Eagle Creek Pack-It Cosmo Pouch is a simple elegant solution for your non-liquid toiletries.

Eagle Creek Pack-It Sac – A very similar item is their Pack-It Sacs in small or medium. The main difference is that the pleating isn’t as wide, the material on the outside is a laminated mesh (so still leakproof), and the sac comes with a little keyring clip on the side, which can be convenient if you want to hang it off of anything (although since the clip is small, you will need something else, like a carabiner, to clip it on anything substantial, like your camp site’s public shower stalls.

Other manufacturers have similar products, including Jansport (with its Spillproof Sak Set). If you’re looking for one Web site with a lot of affordable options, take a look at MEC out of Canada. They have a lot of items, including their On Sight Universal Pouch, On Sight Mesh Organizer, or their truly simple Cactus Creek Ditty Bag.

Cactus Creek Ditty Bag
The Cactus Creek Ditty Bag from MEC is probably the simplest toiletry kit you can own. And at $3.75 (Canadian), it’s cheaper than a Grande Mocha from Starbucks!

In a true pinch, consider using a gallon-sized Ziploc baggie. You can see everything, and you can’t beat its price!

But I want to be able to hang my toiletry kit…

Here are two tips if you want to be able to hang your toiletry kit:

  • Loop a carabiner keyring off of the your zipper
  • Carry a folding travel hanger from which to hang the kit off of

Depending on the sac/pouch you get, some of them will allow you to hang them and still keep the zippers open. Give each one a look to see which work best for you.

Cheap carabiner keychains
Cheap carabiner keychains will let you hang your toiletry kit.

Just remember, regular toiletry kits have too many bells and whistles, like hangers, mirrors, etc. since their goal is to give you “more bang for your buck” when all you need is a small case.

Becoming a guru of your airplane seat

A few years ago, I flew coach on United from San Francisco to Singapore. The flight is over 8,000 miles one way and takes over 18 hours (I had a stopover in Hong Kong).

It had been a long time since I flew such a long flight in coach, and it was one of the most miserable experiences I ever had traveling. To make matters worse, because it was a very full flight and I booked relatively late, I got stuck in a middle seat.

As it turned out, the man sitting in front of me liked to recline. For pretty much the whole trip (even during meal service). Every time he chose to recline his seat, he never bothered to check behind his seat, and would slam his chair back… right into my forehead. Worst of all, there was so little room from the end of my seat to the back of his, that once he would recline his seat, there was no way for me to get to my carry-on by my feet without putting my head in my seatmates’ laps (both strangers, by the way). My only salvation came on my right side—the elderly woman weighed barely 100 pounds and she was traveling with her equally elderly husband, who weighed about the same. They clung to each other for most of the flight and would get up to take breaks and use the restrooms at the same time, which meant I had elbow room on my right, as well as clear access to the aisle and to my bag. Unfortunately they had very large bladders and they only got up about every 4 hours.

Choosing a good seat can be its own science, and one Web site you should bookmark to make the task easier for you is SeatGuru.com.

Seaguru.com
Seatguru.com, founded in 2001 as a way to share information about airline seats.

SeatGuru is ingenious in its simplicity and practical application. It lists all major air carriers, and you can scroll down to find the various aircraft models they use. Select the particular aircraft your flight will likely be on, and voila—You see a seating diagram!

A sample seating diagram from Seaguru.com
A sample seating diagram from SeatGuru.com.

Of particular interest for those who are traveling with just their carry-on is that SeatGuru tells you if there is no overhead bin or underseat space for your bag.

The site offers much more information, however. For example, what exactly is “seat pitch,” how does it differ from legroom, and why is it important for you? Why would a bulkhead seat work for some (more legroom) and not for others (no underseat storage space)? The site even helps you find out how to figure out what aircraft you are likely going to be flying for your flight.

Even if you use an online reservation system to book your flights, don’t just rely on the seating diagram the system offers you when you select your seat. Open a second browser window and find out exactly what you are signing up for.

Here are just a couple of things I consider when selecting a seat:

  • An aisle seat doesn’t always work for me if I plan to stow my main carry-on under the seat in front of me, since there is an intrusive reinforcement bar that sticks down some inches in from the aisle, effectively narrowing the unblocked space I have by about 4 or 5 inches. If I choose an aisle seat, I have to be prepared to stick my carry-on in the overhead bin.
  • Bulkhead seats are nice for the long-legged, but don’t really work if it’s important for you to stake out the overhead bin space for your carry-on. You will have to intrude into someone else’s overhead space (although at this time, airlines do not reserve that space for the seats below).

If you manage to pack absolutely everything into your carry-on bag but you still plan on accessing some of your belongings during the trip, you need to make yourself a little ditty bag to hold those items. Sometimes it’s as easy as using a one-gallon Ziploc resealable bag, although you can use any other lightweight bag. Pack whatever you might want to use during your flight, such as:

  • Reading material, puzzle books, magazines
  • Reading glasses
  • Some snacks
  • Ear plugs
  • Eye mask
  • Travel journal/diary
  • Writing instrument
  • Personal headset (and MP3 player like an iPod)
  • Inflatable neck pillow

In addition, you might want to bring out your toiletry bag so that you can access your lotion, eye drops, and so on. The idea is to minimize your need for reaching up and dragging your carry-on bag, since you might not be in a good position to do so. If you keep all of your in-flight needs in one place, you can quickly slip it out as you are getting settled in your seat. You will likely be able to just put this in the seatback pocket in front of you (especially if it’s a plastic baggie, as it will slide around and possibly out of your reach).

The idea is to try to make your small environment as comfortable as possible, especially for a longer flight. Instead of listening to the same music loop over and over again, consider downloading a bunch of podcasts (I personally love the tales from NPR’s This American Life, and those shows are all an hour long), or listening to an unabridged book on CD (you could even download one from sites like Audible.com, or copy it into your MP3 player so you don’t have to lug a portable CD player around).

Had I had such a small seat pack with me on that flight to Singapore (instead of stashing everything in that unreachable bag by my feet), I wouldn’t have been so miserable for most of that flight.

I wound up having to take another business trip to Singapore the following year. For that trip, I made sure to get a seat in their (slightly more) roomier Economy Plus seat (with an added 3 inches of pitch! Woot…).

Shampoo Sheets

Are you trying to minimize the amount of liquids you pack in your carry-on? Do you tend to use the little bottles of hotel shampoo, but periodically find yourself staying at a budget motel that only provides bars of soap? One alternative is Travelon’s Shampoo Sheets.

If you’re familiar with dissolving soap sheets, these Shampoo Sheets will be a very familiar concept for you.

Soap sheets are basically wafer-thin sheets of soap. I don’t think they’re shaved soap so much a dried film of soapy liquid. Most of them dissolve as soon as you get some water on them, and they’ve been around for quite some time.

Travelon's Shampoo Sheets
Travelon’s Shampoo Sheets

These Shampoo Sheets come in little plastic containers about the size of a roll of dental floss. Opening the flip-top reveals sheets of translucent film that, when put in contact with water, turn into a lather.

The biggest advantage to these Shampoo Sheets are that they are neither liquid nor gel; they contain no water whatsoever. So you can put it somewhere else in your bag and free up the space in your transparent toiletry bag for bottles of other items.

Caveats

You get 50 sheets per pack of Shampoo Sheets, but the instructions say to use between 1 and 6 sheets per shampoo. I currently have shoulder-length hair, and 1 sheet is wholly inadequate for even much of a lather. I think 1 sheet might work if you have a buzz cut. I tried three sheets at once and it was still a pretty lackluster lather. I would not recommend these as your primary shampoo, but as a back-up or when space is a premium, they should work fine.

Travelon also sells other types of sheets:

  • Hand Soap Sheets
  • Conditioner Sheets
  • Shaving Sheets
  • Body Wash Sheets
  • Laundry Soap Sheets

Of these, I also tried the Conditioner Sheets—stay away from these! Because they are not soapy, they do not lather nor dissolve easily. The Conditioner Sheets remind me of the dried conditioner scum that collects around the mouth of a dispenser pump; and if you’re familiar with those, you know that those are very hard to rinse out. I wound up trying 4 sheets at once. They were difficult to dissolve, and I wound up with clumps in my hair that I couldn’t rinse out. I found little clumps stuck in my hair after I got out of the shower!

For the others, I don’t know if they’re partiuclarly helpful since the Laundry Soap Sheets will probably require quite a few to get any lather, and regular soap should work just as well instead of all of the specialized soap sheets.

Retail seems to be about $5.00, but you can purchase one here from PackingLight.com for $2.95 (despite its name it is not affiliated with Travelite).

Time for United passengers to pack an overnight bag

A little piece of news snuck through last Friday: Beginning this October, United Airlines is imposing minimum stays for its economy class round-trip tickets. How long you have to stay depends on the price of your ticket and where you go, but this is yet another way a major carrier is trying to find ways to increase revenue. From someone who’s flown on United for no purpose other than to get enough miles to bump up to the next frequent flyer status (and who sat at the airport in New Hampshire for three hours), this is really heinous.

If you must do a previously unnecessary overnight trip and you’re on business (and you’re not a Mileage Plus Premier member), you have the additional challenge of trying to minimize your stuff to avoid United’s $15 first-bag check-in fee. The main thing you need to do is to minimize your entire load and still take the things you need to be able to work:

Consider switching to an ultralight portable laptop, like the Asus EEE or the Apple MacBook Air.

Asus EEE
The Asus EEE PC might not have all the bells and whistles of a 15-pound brethren, but it does most of the things you want to do while on the road.

The Asus EEE is tiny, but it still lets you do a lot of your computer work.

If all you need to do is check your email, browse the Web for fun and stay in touch, consider getting something even smaller, like a Blackberry or iPhone. If you are making presentations, consider storing everything in a portable USB flash drive, and using the computer at your client’s site.

USB flash drive
A USB flash drive takes up almost no room in your belongings, but can pack tons of data.

The main goal here is to lighten your electronics as much as possible, because doing so frees up a lot of room in your carry-on for overnight items, such as clothes and toiletries.

Make sure you keep your work stuff separate from your overnight stuff by keeping the two in separate compartments. The easiest way to do that is to pack your overnight items in something like an Eagle Creek Cube. Get ones with a mesh side and a carrying handle so that you could easily remove them from your carry-on.

Eagle Creek Cube
An Eagle Creek Pack It Cube makes packing clothing a little easier.

Finally, chuck that horrible laptop bag! There’s nothing as heavy and cumbersome as the traditional black leather laptop case. You can tuck your laptop into a compact sleeve (made from padded materials like Neoprene) and slip it into the side of a regular carry-on bag.

Redmaloo laptop envelope
The Redmaloo felt laptop sleeve is an innovative little laptop case that folds out to provide a built-in mousepad (product Web site).

If you need it to look presentable for work, consider purchasing a laptop sleeve that comes with carrying handles and that looks presentable on its own.

The Sherpani Laptop Sleeve
The Sherpani Laptop Sleeve (available from Luggage.com), is easy to slip into a carry-on but has a shoulder strap so that it could be carried around on its own and still manage to look presentable.

This may be heresy but one option is to go the way a lot of business now do, and just start flying the low-cost discount airlines where you can (like Southwest). The perks aren’t as great but their counter service is terrific—it will be the friendliest bus ride you will ever take.

A Perfect Spritzer

A quick note: Earlier today, I sent an e-mail about reactivating this site to the 1000+ readers who’d subscribed to my Yahoo Groups announcement list over the years. I was kind of steeling myself for a bunch of unsubscription requests and negative feedback, but I was pleasantly surprised to receive a number of messages thanking me for reviving the site. It’s nice to know people are still interested in this topic—thank you! You can sign up for the Travelite Yahoo Group announcement list here, or send e-mail to this Yahoo Groups address.


I’m always on the lookout for things I can use to travel with, and every so often I come across an “A-ha!” item. There’s just such an item on the market right now, and since I don’t know how long the fad will be happening, let me share this with you so you can buy a few for your stash.

Most smart travelers don’t bother traveling with aerosol cans, because it might not pass the security muster in some places. If you carry any spray bottles at all, they’re little pump spray bottles like the one pictured here:

Small spray bottle
Small spray bottle.

These spray bottles aren’t bad. I use them for all sorts of things, from hairspray to wrinkle releasers. I often also fill one with clean water to spritz my face with when I’m on a longer flight. But for most of my trips, I rarely ever use the entire contents of the bottle—and that means I’ve always had room to trim it down a bit. The problem is, it’s darn difficult to find spray bottles in stores—empty or not—that are much smaller than 2 ounces. You do occasionally run into a few; usually with things like eyeglass cleaner solution. You have to be rather careful with those, though, and make sure to wash and rinse them out really well to clean out the original contents.

Well recently, I’ve started seeing an even smaller bottle of pump spray—an amazingly tiny 0.17 ounce size! They are all sold filled with hand sanitizer, and they seem to be the current fad (remember when all hand sanitizers a few years ago were of the rubbing alcohol-gel type?).

Hand sanitizer spray
A little pen-style bottle of hand sanitizing spray.

Here’s what’s really cool about these things:

  • They all come with a pen clip on its cap, so you can clip it in your pocket for easy access
  • They are all about the length and size of a Sharpie marker
  • They are safe to refill (after proper cleaning) because the original product is meant to have contact with your skin
  • They are refillable!

So far, I’ve come across these at Longs Drugs, Walgreens, CVS, Wal-Mart, and other drugstores.

There are a couple of caveats:

  • The plastic spray bottle is manufacturered by at least a couple of different brands, and the Wal-Mart house brand has a “pen cap” that neither snaps in place nor has a long enough sleeve over the bottle, leading me to lose the cap in my purse all the time.
  • Some of the bottles have the labeling silkscreened on, so if you’re the type to “relabel” your empties you will have difficulty removing the original labeling.
  • There is at least one brand that allows you to pump the pen cap itself. These bottles are not refillable.

Now I routinely carry these little pen-sizes spritzers. I filled one with hairspray. I have another that I keep empty, then fill with water before I embark on a plane, which lets me spritz my face. I keep it in my breast pocket so I don’t even have to fuss through my carry-on. You could easily use these for things like bug spray, light cologne, and liquid sunscreen.

I use an address label to keep tabs on what the contents are (I use weatherproof mailing labels from Avery), but you could easily use a grease pencil as well.

Happy spritzing!

Don’t pay the airlines for water

Reading today’s blog entry from travel consumer writer Chris Elliott (“The coming dehydration crisis for airline passengers”), I was disconcerted to learn that the new policy US Airways is implementing for charging passengers for soft drinks includes charging them for bottled water (read the press release from the airline).

I don’t know about you, but I’m not a huge fan of drinking “tap water” from airplanes—they’re regular water hosed into a holding tank on the plane. On drinking water on airplanes, travel safety advocate and author Diana Fairechild says:

I stopped drinking airplane water my first year of flying after I saw floating particles in the water, and also after I saw mechanics filling the airplane water tanks from hoses on the runways, wherever we landed–even Bombay.

Serving tap water to passengers is common because the airlines don’t provide enough bottled water. They prefer to fill the limited supply spaces on board with liquor and soft drinks, both of which actually increase the passengers’ jetlag because they exacerbate dehydration.

I have a one-word reaction for ya: Ewwww.

The problem is, you can’t take your own bottle of water through airport security. You have to pay money for a new bottle of water once you’ve passed security. And if you have a long flight, that one-liter bottle of water probably won’t cut it for you.

You might argue that if I can afford to pay for an airline ticket, I should be able to spend $3.00 for a bottle of water, yes? Except that I think it’s ridiculous that the airline is charging for clean water. Food? Sure. Salted peanuts? OK. Booze? Of course. But clean water? Aircraft cabins are very dry and it’s common for people to wind up with symptoms of dehydration; I’m with Chris Elliott on this one—US Airways has some gall. I think I’d refuse to buy their bottled water on principle.

What to do if you don’t want to keep paying for overpriced bottled water at airports? Assuming that the water from drinking fountains at aiports is potable (that is, safe for drinking), my suggestion is that you take an empty vessel with you to fill once you get past security:

Refill a disposable water bottle – the easiest method is to take an empty disposable water bottle. If you’re the type that wants to look like you just bought a new bottle of Evian, this is one way to go. This way you can easily toss them when you’re done. As long as your bottle is empty, you can take it through airport security without a problem.

A few years ago, Evian used to sell the Nomad, which made carrying them really easy. I stopped seeing them about five years ago, although I saw them a few years ago in Singapore.

Evian Nomad
The Evian Nomad; alas, no longer sold in the U.S.

Bring and fill your own reusable bottle – For a while, Nalgene had a real hit on its hands with its wide-mouth Lexan bottles (purchase here). You couldn’t walk through a college campus without seeing these dangling off of people’s bag straps.

The popular Nalgene bottle.
The popular 32-ounce Nalgene drinking bottle.

The problem was, you had to unscrew the top to drink from it, and because the opening was wide, you were likely to have some splash issues if you were say, flying in turbulence. Nalgene has begun selling modified versions of their popular bottle, but for my penny I’d rather spend it on the Camelbak Better Bottle (purchase here).

The Camelbak Better Bottle
The Camelbak Better Bottle.

Unlike its Nalgene cousin, the Better bottle uses Camelbak’s patented “bite-valve” straw. It means no leaks, no splashes, no unscrewing the top to drink. The loop in the handle means you can hang these off your bag, and the plastic is the same hearty stuff that Nalgene uses.

Use a collapsible water bottle – One really good option is the Platypus. Not nearly as common as other bottles, this one is marketed specifically for backpackers and travelers, and seems to be a custom fit for our particular situation. Designed for backpackers, the Platypus Platy Bottles (purchase here) are made of thick flexible plastic that collapses completely flat. They come in various sizes, and you can easily carry a couple of these with you for your flight. Just fill them up at a water fountain once you’re past security. Slip them into the seatback pocket in front of you, and you’re all set.

The Platypus Platy Bottles
The Platypus Platy Bottles.

The Platy bottle is probably your best solution if you have to fly US Airways. My suggestion? Fly another airline.